
In today’s fast-paced business environment, having quick and reliable access to data is essential for success. To ensure that for your work SQL services are always available, it’s crucial to implement a high-performing and advanced platform. One such advancement is SQL Server Database Mirroring, which involves setting up two SQL servers – a primary server and a mirrored server – to provide continuous access to your data, even in the event of a server failure or emergency.
Table of Contents
ToggleUnderstanding SQL Server Database Mirroring
SQL Server Database Mirroring is a technique that allows you to make your SQL Server available to users when the main database server is down or in any other emergency situation. It can be implemented at the database level, but it’s important to note that the database must be in a fully-recovery model.
The implementation of SQL Mirroring involves two SQL servers, which can be either on the same machines or different machines. One of the servers acts as the primary server, while the other has a mirrored SQL server instance of the primary server.
Different Operating Services of SQL Mirroring
There are three different operating modes of SQL Mirroring: High Safety, High Safety with Automatic Failover, and High Performance.
High Safety:
In this mode, the principal and mirror databases are kept in sync with each other. Any changes made to one database are applied to the other, ensuring data consistency. This mode provides the highest level of safety and security but may reduce the processing speed of transactions.
Automatic Failover:
This mode works similarly to High Safety Mode, but with the added functionality of automatic failover. If the principal database fails, the mirror database automatically becomes the principal database, ensuring continuous availability of data.
High Performance:
Unlike the previous two modes, High Performance mode operates asynchronously. Data is initially written to the principal database and then transferred to the mirror database. This mode provides better performance but may result in a slight delay in data synchronization. It is only available in the SQL Server Enterprise Edition.
Setting Up Database Mirroring
Setting up SQL Server Database Mirroring requires a series of steps. Let’s walk through the process:
1. Create the primary and mirrored servers:
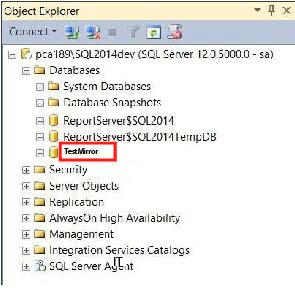
Start by creating two servers – the primary server and the mirrored server. These servers can be on the same machine or different machines. Make sure to name them appropriately to avoid confusion.
2. Create the database:
Connect to the primary server and create a database that you want to mirror. If you are mirroring an existing database, it is advisable to take a backup of the database before proceeding.
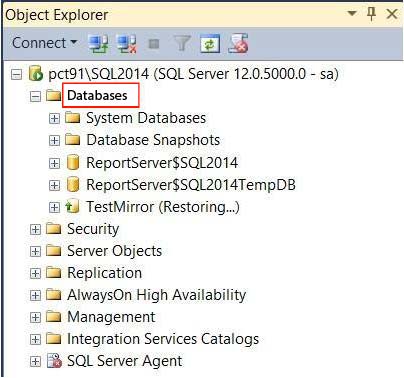
3. Restore the database on the mirrored server:
Restore the database backup on the mirrored server, ensuring that you choose the “No Recovery” option. This will prepare the mirrored server to receive data from the primary server.
4. Configure mirroring:
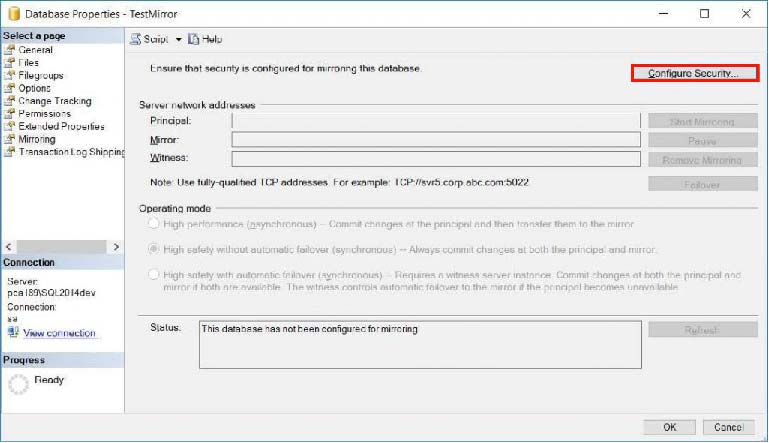
On the primary server, right-click on the database and select “Task” > “Mirror” to open the mirroring configuration wizard. Follow the wizard’s steps to configure the mirroring settings.
5. Configure security:
In the configuration wizard, you will have the option to configure the witness server. If you are not using a witness server, you can skip this step. Next, you will need to provide additional information related to the principal server, such as the endpoint name and listener port.
6. Configure the mirror server:
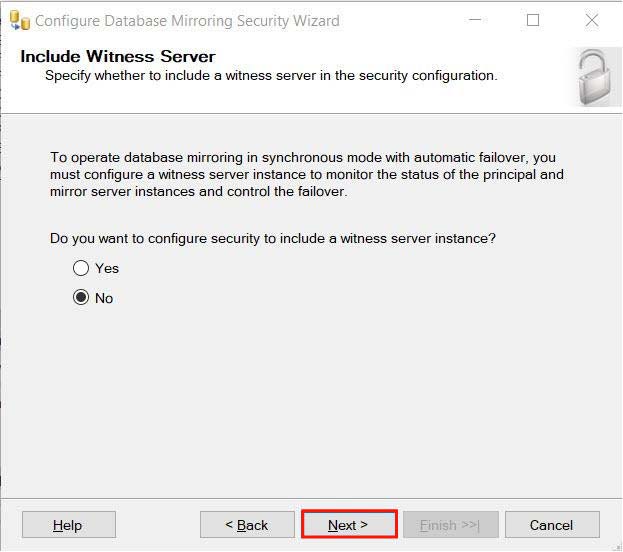
Connect to the mirror server instance and provide the necessary credentials. The configuration wizard in SQL services will auto-populate the listener port and endpoint name based on the information from the principal server.
7. Provide service account details:
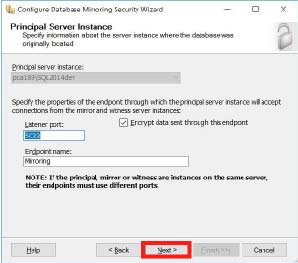
If both servers are in the same domain, you can leave this step blank. Otherwise, provide the necessary service account details for the mirror server.
8. Verify the configuration:
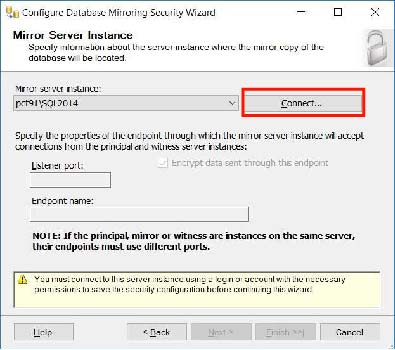
Once the mirroring configuration is complete, you will see a summary screen that confirms the success of the configuration. Verify the details and click “Close” to continue using SQL Services.
9. Start the mirroring:
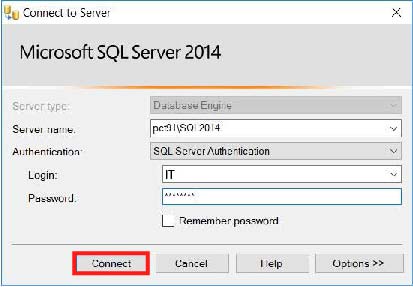
After closing the configuration wizard, you will be prompted to start mirroring. Click “Start Mirroring” to initiate the mirroring process. You can also choose to start mirroring later if you want to configure different operating modes.
10. Monitor the mirroring process:
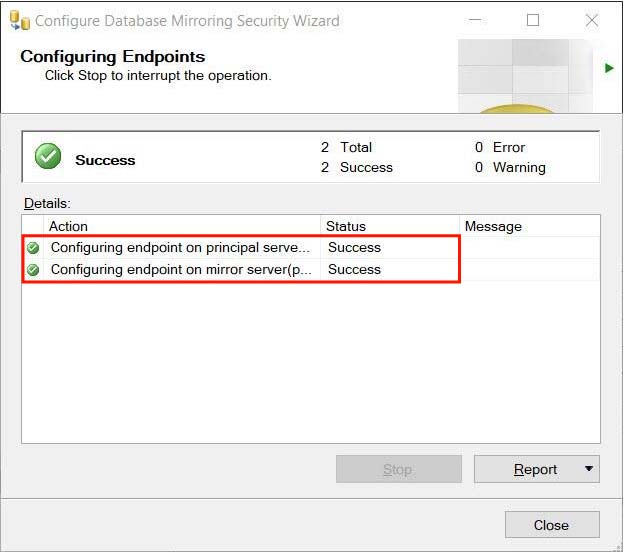
Once mirroring is started, you can monitor the mirroring process to ensure that data synchronization is happening correctly. This can be done using SQL Server Management Studio or other monitoring tools.
11. Failover:
In the event of a failure or emergency, you can manually initiate a failover by right-clicking on the principal database, selecting “Task” > “Mirror,” and clicking the “Failover” button. This will make the mirror database the new principal database.
Our SQL Services offers several benefits, including:
- Database availability: Mirroring ensures that your database remains available even in emergency situations or server failures. It provides a failover mechanism that allows for uninterrupted access to your data.
- Data protection: By implementing mirroring, you can address data redundancy and improve data safety and performance.
- Database availability during upgrades: Mirroring can help reduce downtime during server upgrades by allowing you to upgrade one SQL server instance at a time while keeping your failover partner online.
SQL Services by IT Company
In conclusion, SQL Server Database Mirroring is a powerful technique to ensure high availability using our SQL services. By implementing mirroring, you can protect your data, maintain database availability during emergencies, and minimize downtime during server upgrades. Consider implementing SQL Mirroring to enhance the robustness of your data-related environment and stay ahead in the competitive market. Invest in SQL services and experience the benefits of high availability and data protection.